
I've put up shelves, hung cabinet doors, and built workbenches from scratch. So when a dual monitor arm arrived at my door in a flat box with a dozen loose bolts and a single folded sheet of instructions, I didn't panic. But I've also watched my neighbor spend ninety minutes on a job like this because he skipped two steps that mattered. The VIVO dual monitor arm, model STAND-V002, is a well-built piece of steel with over 60,000 Amazon reviews and a street price under forty dollars. It's not complicated, but there's a right order to things, and a few spots where doing it wrong costs you time you won't get back.
Most of the grief people run into with monitor arm installs comes down to three mistakes: they clamp to the wrong part of the desk, they over-tighten the hardware before everything is in position, and they skip the cable routing until it's too late to fix cleanly. This guide fixes all three. Follow it in order and you'll have both monitors up, level, and routed in under an hour, even if this is your first time.
If your monitors are still sitting on their factory stands, you're losing six inches of clear desk space you didn't know you had.
The VIVO STAND-V002 holds two screens up to 30 inches and 22 lbs each on a single heavy-duty steel arm. Under forty dollars, C-clamp and grommet hardware both included.
Amazon Check Today's Price on Amazon →Step 1: Check Your Desk Before You Open the Box
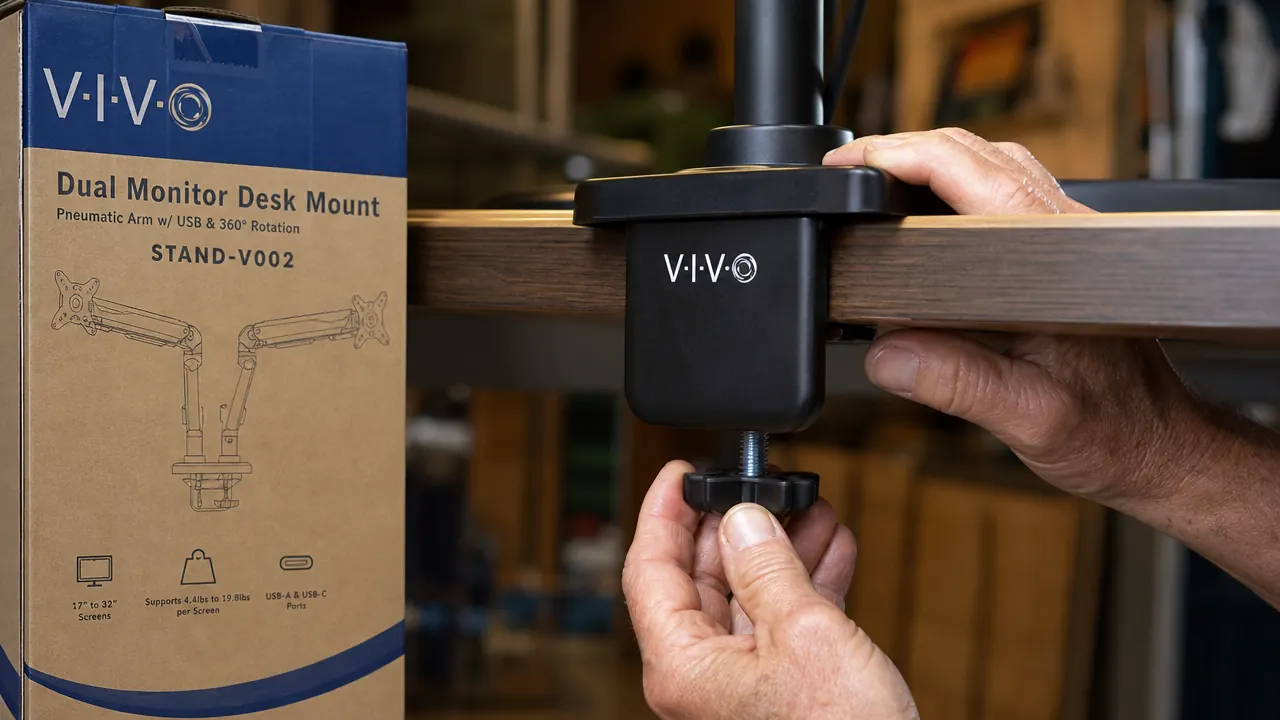
The VIVO STAND-V002 ships with two mounting options: a C-clamp for solid desk edges and a grommet mount for desks with a pre-drilled hole. The C-clamp is what most people use, and it works on desks from 3/4 inch to 3.5 inches thick. Before you do anything else, measure your desk edge with a tape measure. Not guess. Measure. I have a solid cherry top at my desk that runs 1.5 inches thick, well within range. IKEA BEKANT and LINNMON tops run 1.25 to 1.5 inches. Most builder-grade home desks land between 3/4 inch and 1.5 inches. You are fine on all of those.
Glass-top desks are a different matter. The C-clamp will crack glass, full stop. If your desk has a glass surface, you need the grommet mount, which requires a pre-drilled hole typically 20 to 35mm in diameter. If your glass desk has no grommet hole, this arm is not the right tool for that surface. Hollow-core furniture board desks, the cheap ones with honeycomb cardboard inside, deserve a second look too. The clamp will compress the hollow edge and may not hold. Knock on the underside of your desk near the edge. If it sounds hollow, find a solid section closer to the frame, or consider the grommet mount positioned over a solid interior support. Know your desk before you pick up a wrench.
Also take a minute to clear everything off the desk surface and measure where you want the arm base to sit. The VIVO pole mounts on a single base that takes up about three inches of depth on the desk edge. The arm reach extends roughly 19 inches forward from the pole. Sketch a rough top-down view on a piece of paper if it helps. Where you clamp matters for how far the monitors can swing and whether you can still open desk drawers underneath.
Step 2: Attach the Base, Clamp or Grommet
For the C-clamp setup, thread the knob bolt up through the clamp body so the rubber pad is facing upward toward the desk's underside. Slide the base plate onto the top of the desk edge first, then thread the lower clamp up from below. The rubber pad protects the underside of the desk from scratching. Hand-tighten the knob until it grips, then give it another half turn with a wrench, not more. The goal is firm contact, not maximum torque. Over-tightening compresses the desk surface and on painted or laminate finishes, it leaves a permanent impression. Firm grip is enough.
For the grommet mount, drop the post down through the hole in your desk, place the large washer and rubber pad on the underside, and thread the hex nut up from below. Use the included hex key to tighten until snug. The grommet setup is actually cleaner-looking in a finished office because the pole comes straight up from the desk surface with nothing hanging off the edge. If you have a grommet hole and plan to stay at this desk for years, use it.
Either way, before you go further, test the base by pressing on the pole with reasonable force in different directions. It should not shift. If it moves, tighten incrementally until it doesn't. A base that shifts after the monitors go on means a trip back to square one, possibly after something falls.
Step 3: Attach the Pole and Arms
The vertical pole slides into the base socket and is secured with an Allen bolt on the side of the base collar. Slide it in, set it to the height you want before tightening, and lock it down. A practical starting height: your monitor centers should end up at roughly eye level when you are seated with good posture. For most people that is somewhere between 43 and 50 inches from the floor, depending on chair height. Measure your seated eye level with a tape before you lock the pole, because adjusting it after both monitors are mounted is awkward.
The two monitor arms attach to the pole via collar brackets that you slide on and tighten with a hex key. Position the first arm at your estimated final height. Slide the second arm on below or above it, depending on whether you want a stacked configuration or side-by-side. For side-by-side, both arms go on at roughly the same height on the pole. Finger-tighten both collar bolts for now. You want them moveable but not floppy while you attach the monitors in the next step.
Step 4: Remove Monitor Stands and Attach VESA Plates
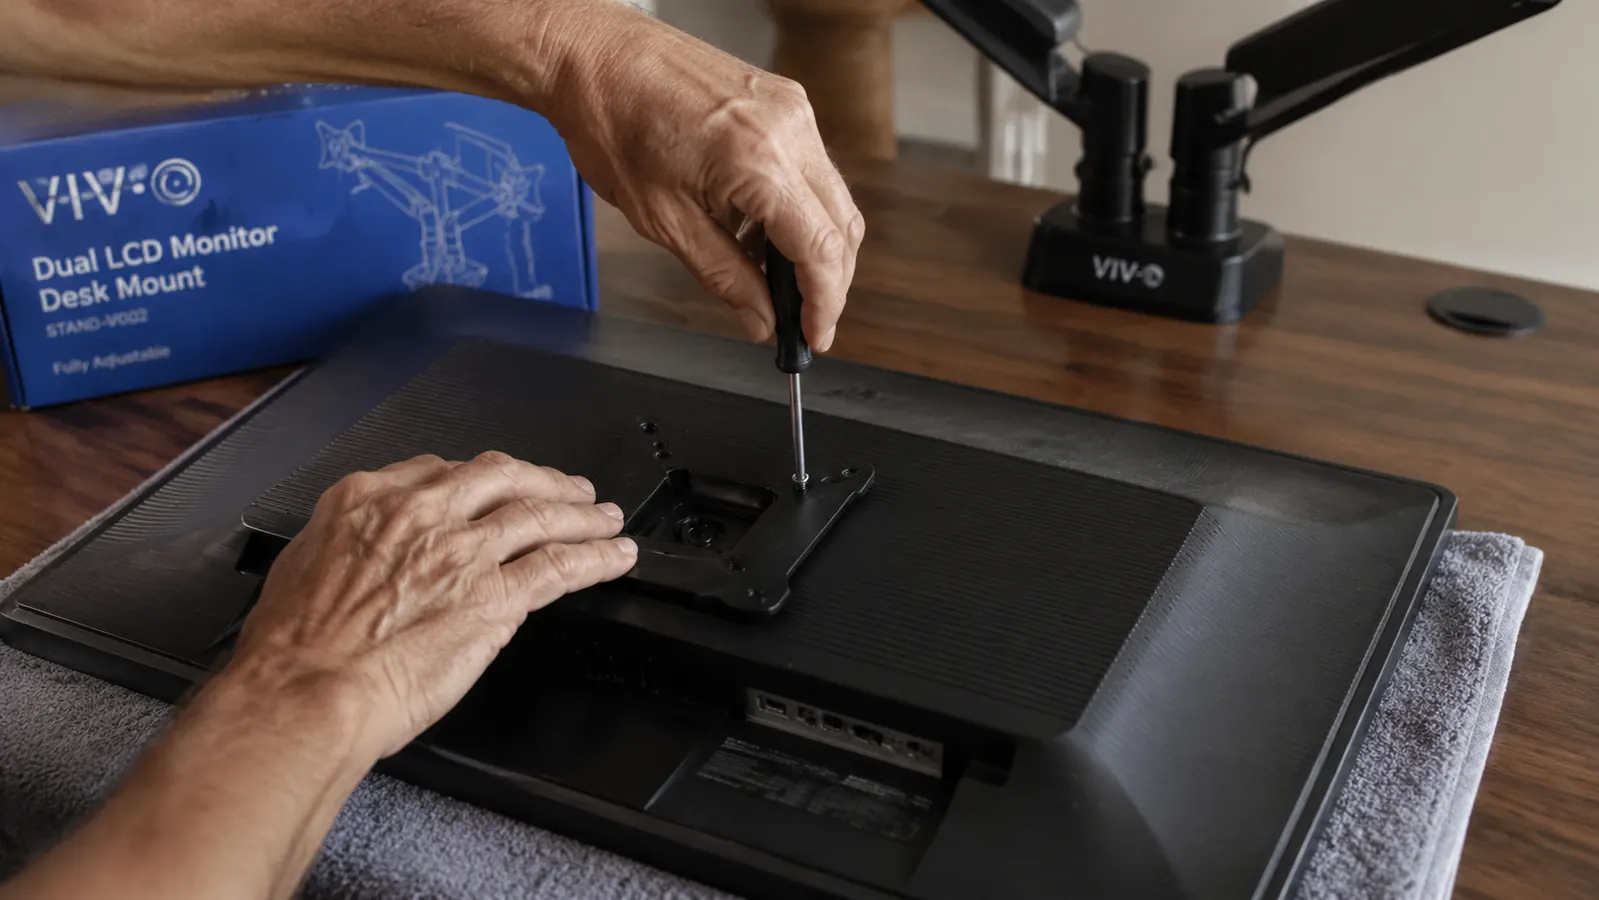
Almost every monitor sold in the last ten years has a VESA mount pattern on the back, either 75x75mm or 100x100mm, the more common of the two. Check your monitor's user guide or the label on the back panel for the spec. The VIVO arm ships with a mounting plate that fits both patterns via offset bolt holes. Before you attach anything, lay each monitor face-down on a folded towel or a piece of cardboard to protect the screen. Remove the factory stand by loosening the screws on the neck attachment, usually on the back of the panel near the bottom. Keep those screws in a bag in case you ever need to restore the factory setup.
Bolt the VESA mounting plate to the back of each monitor using the M4 or M6 screws included in the VIVO kit. The screws should thread in firmly by hand for the first several turns before needing a screwdriver. If a screw goes in crooked or won't seat, stop and realign it rather than forcing it. Stripped VESA threads in a monitor body are a headache. Snug, not over-torqued. Now hang the mounting plate onto the ball-joint receiver on each arm. The plate clicks into a post on the receiver, then a locking pin or screw secures it. Give the monitor a firm forward pull to confirm it is seated before letting go.
Once both monitors are on, do your arm tension adjustment. Each arm on the STAND-V002 has a tension bolt inside the arm body, accessible from the end of the arm with the included hex key. Tighten the tension bolt until each monitor holds its tilt position without slowly drooping forward. A monitor that drifts down over the course of a day means you need a quarter turn more tension. Start with what feels right, use the arm for twenty minutes, and come back for a small adjustment if needed.
Step 5: Route Cables and Dial in Final Position
This is the step most people skip and then regret. The VIVO arm has cable management clips along the arm spine and a channel at the pole for routing cords out of sight. Feed your monitor cables, HDMI, DisplayPort, or USB-C, through the arm clips before you tighten everything into its final position. Once you have the arm locked in and the monitors exactly where you want them, pulling cables back through is a nuisance. Do it now while everything is still loose and accessible.
With cables routed, swing each monitor into its working position, check eye level, check tilt, and check that the arm does not press against any monitor bezels at full lateral swing. Now go back and fully tighten the collar bolts on the pole. Tighten the tension bolts to the final setting. If you have a cable management spine, velcro straps at the base of the pole keep the cables bundled where they exit the arm toward the desk surface or wall. The whole back of the desk should look intentional at this point, not like a tangle.
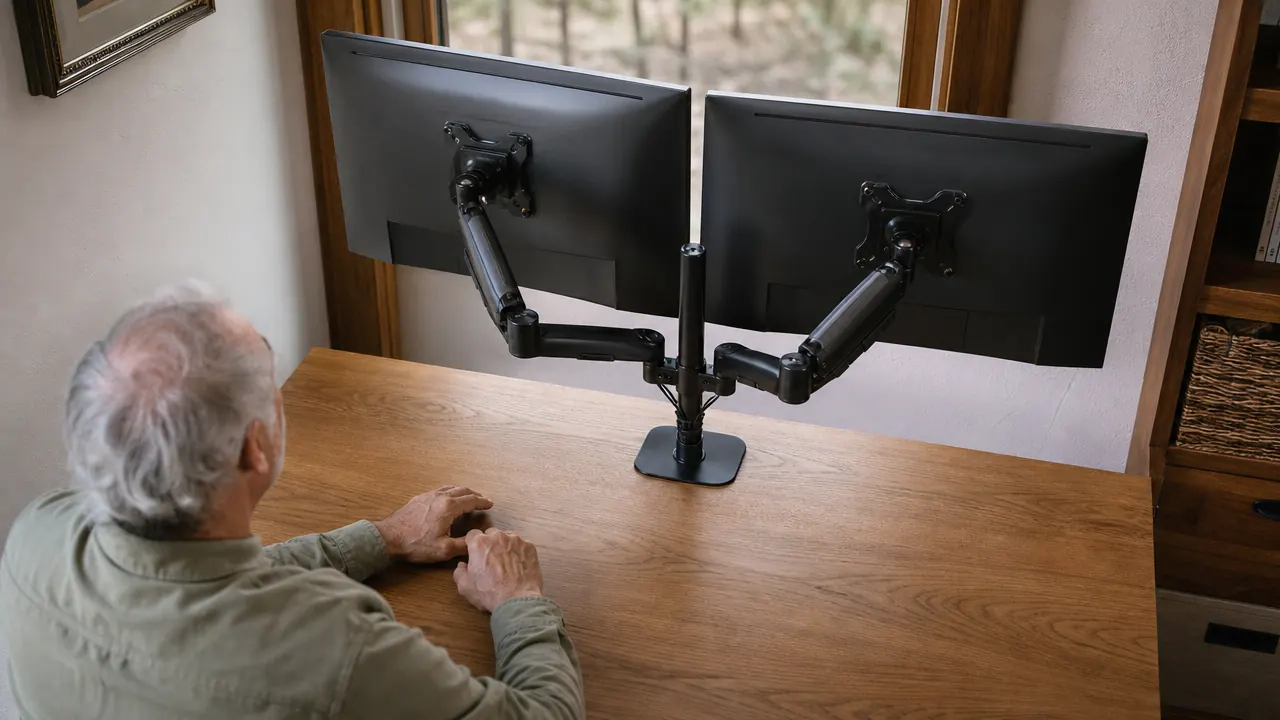
Sit down. Set your screens to the angle you actually read at. Adjust tilt for the top of the monitor to be very slightly farther from you than the bottom, which reduces glare from overhead lights. Check that your eyes land naturally at the top third of each screen, not at the top edge. If you are craning your neck up, lower the pole half an inch. If you are looking down at the screens, raise it. This part takes five minutes and it is the whole point. A monitor arm that is still set to the same height it shipped at after three months was not worth installing.
What Else Helps
Once your monitors are up and the cables are routed clean, a few more things round out a properly finished setup. A smart power strip with individually switched outlets, like the Kasa HS300, is worth putting under the desk or mounting to the back panel so you can kill the monitors and peripherals at end of day without crawling around unplugging things. If you are going to spend the time to clean up cable routing on the monitor arm, do the same from the arm down to the power strip. One neat run beats six separate tangles every time. Beyond power, good desk lighting that does not create glare on the new screens is worth sorting. You have already done the hard part by getting the monitors off their factory stands and up to the right height. Now make the light match.
I've installed a lot of hardware over the years. The VIVO arm is about as honest a piece of gear as you'll find under forty dollars. Steel where it needs to be steel, adjustable where it needs to move, and the instructions are short because there isn't much to explain once you know the order.
Two monitors on one arm free up the desk space you have been working around for years.
The VIVO STAND-V002 is heavy-duty steel, holds up to 22 lbs per arm, and fits virtually any desk with the included C-clamp or grommet hardware. 60,000 reviews, under forty dollars. It is the kind of thing you buy once and forget about.
Amazon Check Today's Price on Amazon →